Home
Biography
Tables, Chairs
Cabinet Furniture
Beds, Built-ins, Other Work
Exhibitions, Galleries, News
Articles
Teaching and Student Work
Contact
Richard Jones Furniture
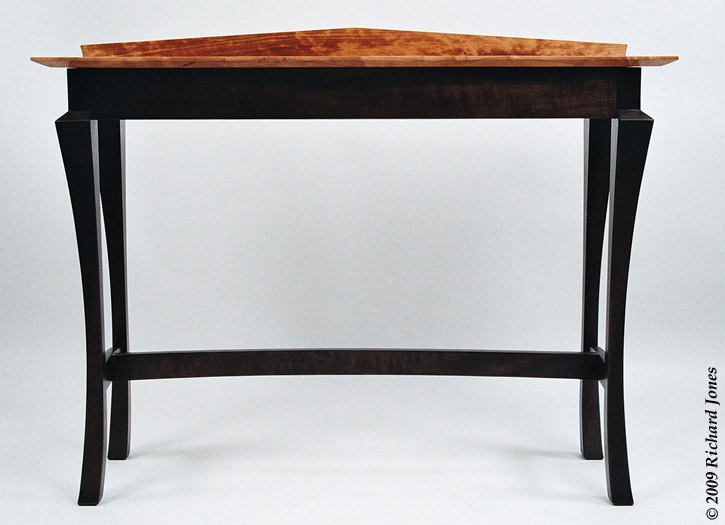
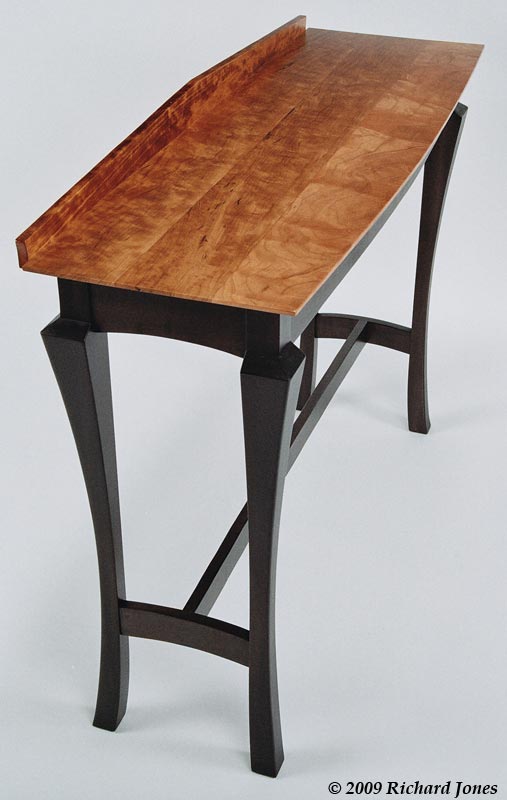
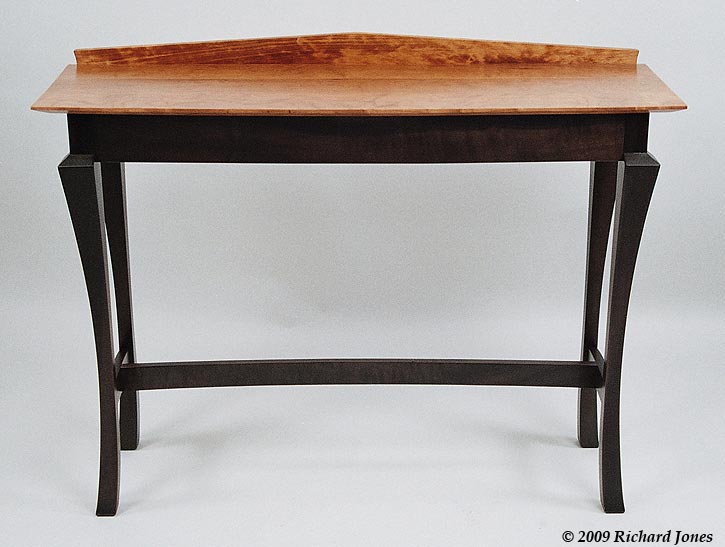
Equus Tabula
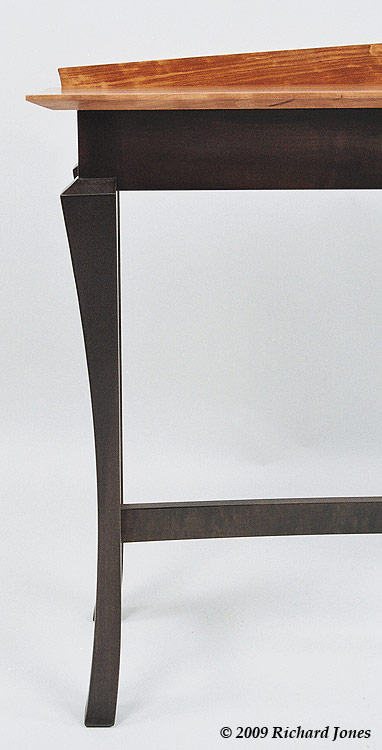
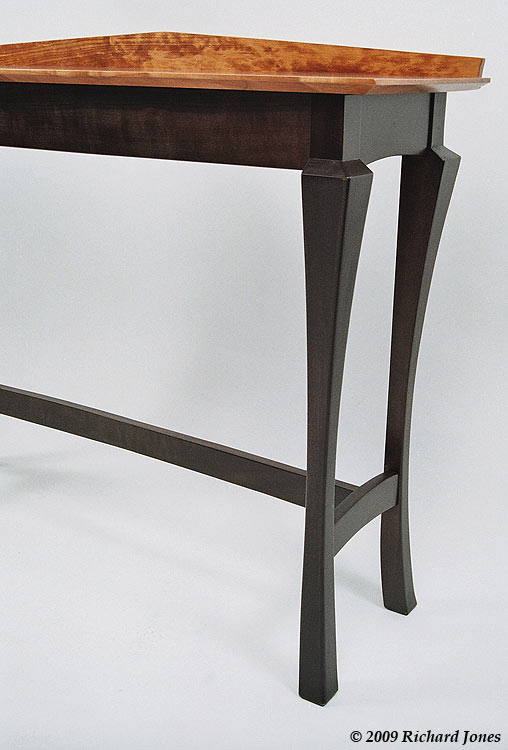
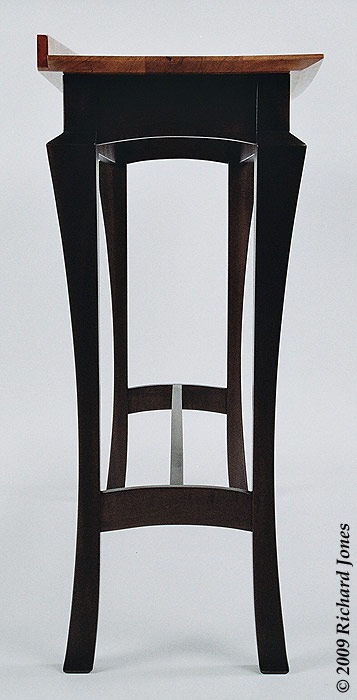
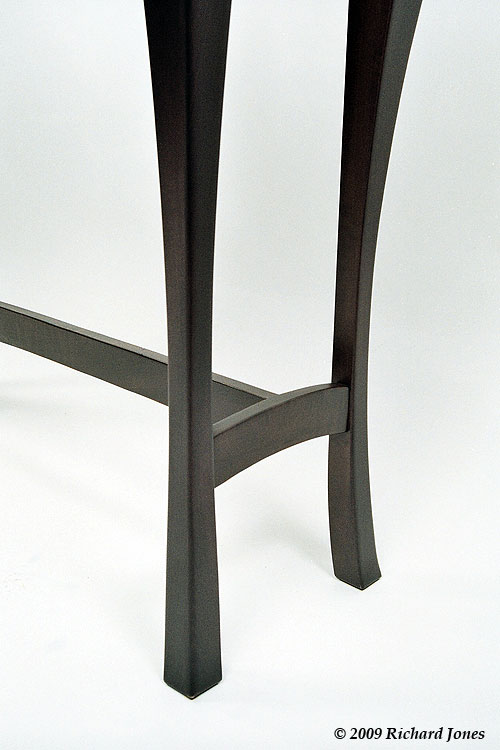
American black cherry and poplar legset. Legset dyed black and polished with black tinted lacquer. Cherry top polished with clear lacquer.
H 910 X W 1160 X D 395 mm ( H 36" X W 45-5/8" X D 15-9/16")
Every once in a while a furniture designer and maker chances upon an exciting find as they sort through piles of wood at the timber yard selecting boards for a project. The inspiration for this piece came from just such a find. Some years ago when I lived in Texas I was picking out American black cherry boards for a fairly standard cabinet or table project- I don't recall which now, and buried in amongst the 'ordinary' stuff were two exceptionally wide, twisted, cupped and bowed pieces. It was apparent, even through the dirt and rough surface left behind by the mill that the colour was dark and rich, and the grain was gnarled, swirling and striking. I didn't need these pieces of wood but bought them anyway thinking that at some point in the future I'd find a use for them.
Nearly ten years passed between the purchase and the design and construction of this table, and the wood travelled with me as I moved around from Texas back to Great Britain to near Oxford and then Leeds. Sometimes a piece of wood is so striking that you have to design a piece of furniture around it, and this is the case here. The design is a marriage in which a sculptural almost black leg-set, that might or might not be wood, incorporating long sweeping curves with sharp geometrically angular faceted shoulders contrasts strikingly with the rich erratically tan coloured highly figured cherry. The result is a dramatic statement piece to grace an entry way, hall, living room, landing, business or reception area, drawing room, etc.
One
suggestion for displaying the piece in a home or business
setting might be to place it beneath a large mirror or cherished
painting with down-lights above casting a soft dispersed warm glow
to bring out the tans, reds and browns in the table top. Add a
single glass, ceramic or wooden bowl filled with dried flowers
placed near one end,
and flank the table with a slightly mis-matched pair of decorative
chairs, sculptures or
wooden cabinets, possibly display cabinets.
Polishing the legset incorporated water based dye and tinted lacquer. Preparing
the surface to remove scalloped machine marks required various planes
such as a compass plane, spokeshaves, smoothing and block planes and a final
sanding from 120 to180 grit with abrasive paper. Hot water on a cloth was wiped
over all the sanded surfaces to raise the grain followed by sanding
back the fuzz with 180 grit after the wood had dried. Water based black
dye thinned out by about 20% was applied to all the wood surfaces and
left to dry. Three coats of pre-catalysed lacquer followed: the
base coat and the second coat were 90% sheen and the final coat 10%
sheen to give a matte appearance. Each half litre of polish received about 20
millilitres of full strength black spirit dye to gently reinforce
the colour of the already dyed wood.
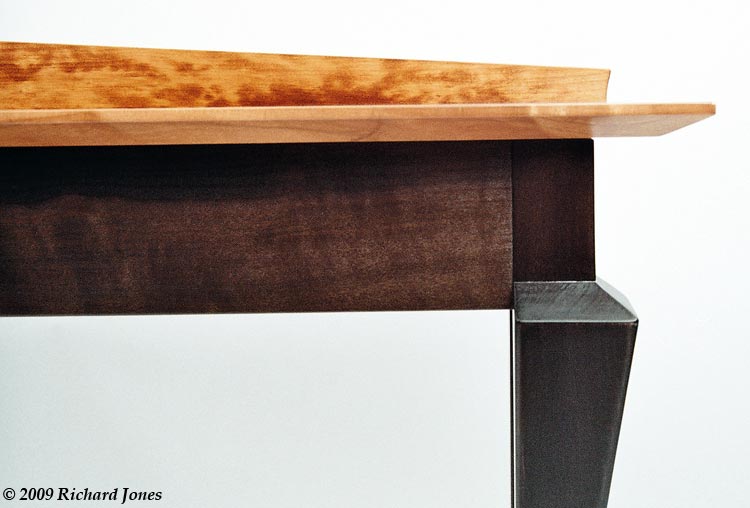
The end result is a dark grey, but this still leaves the wood grain underneath playing peek-a-boo with the viewer. The purpose of this finishing schedule over a fine textured timber was to emphasise the lines, curves, facets and profiles of the form as if it might almost be made of something other than wood. A black dyed coarse textured wood such as oak or ash still has an obvious strong wood grain effect that I wanted to avoid, but here the wood is only glimpsed and hinted at through the finish.
To both contrast and compliment the legset, the finish applied to the highly figured cherry top is two coats of pre-catalysed lacquer: a first coat of 90% sheen with the second coat 50% sheen to bring out and emphasise the grain. This encourages the eye to seek out and follow the erratic swirling patterns along with the variations in colour, and so encourages the viewer to sweep their fingertips over the surface to appreciate the tactile qualities of the texture to reinforce the visual feast.
The following photo essay with explanatory text illustrates stages in the construction of the legset.
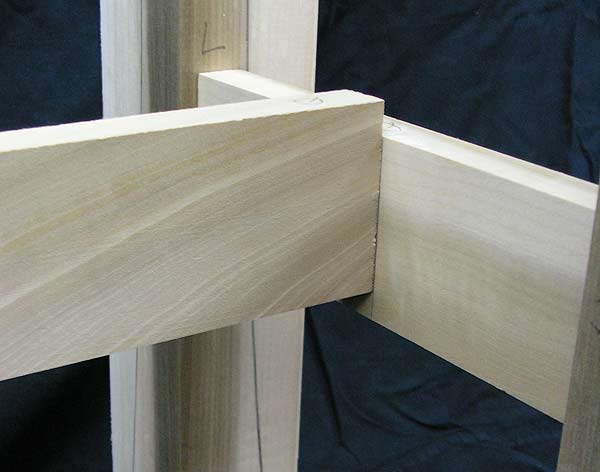
Working
from an isometric projection (working drawing) the rails and the H
shaped stretcher were joined to the legs using mortice and tenon
joinery. At this point all the leg set parts were square sectioned to
ensure the joinery was accomplished as accurately and easily as
possible.
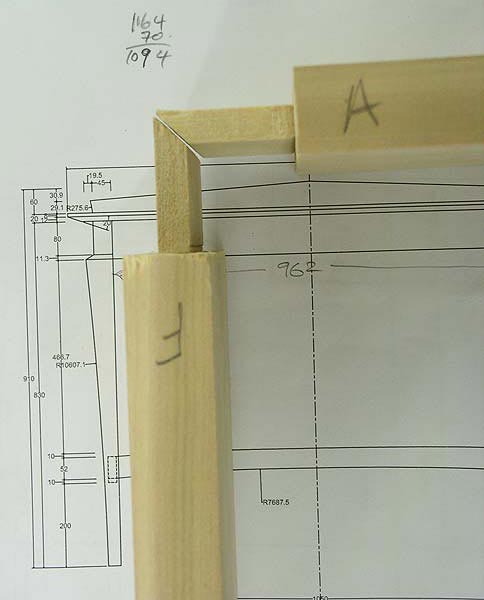
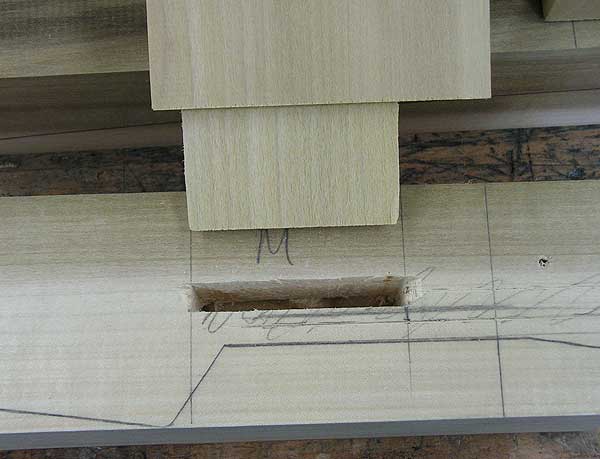

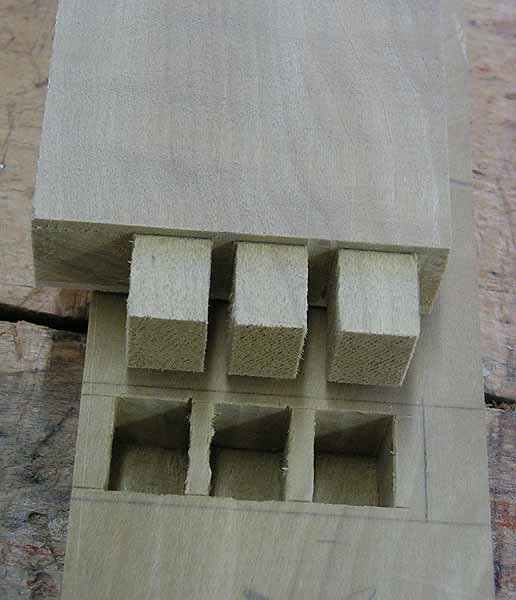
Three stub forked tenons join
the long stretcher to the short front to back side stretchers to
maximise long grain to long grain gluing surfaces because stretcher
material is only 20 mm thick.
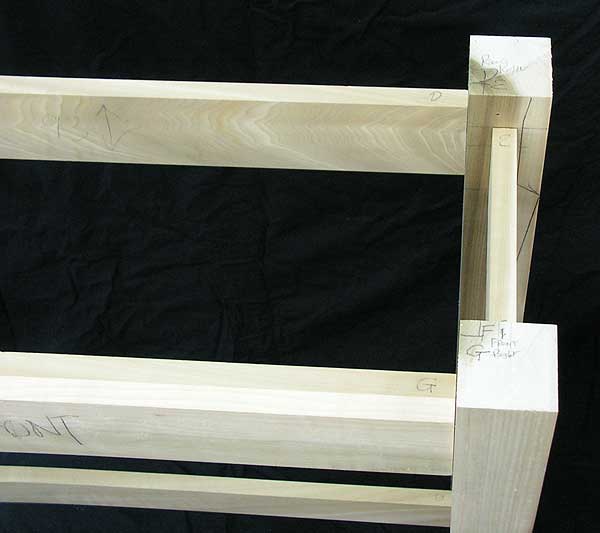
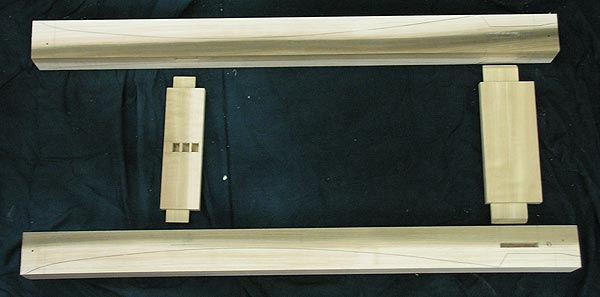
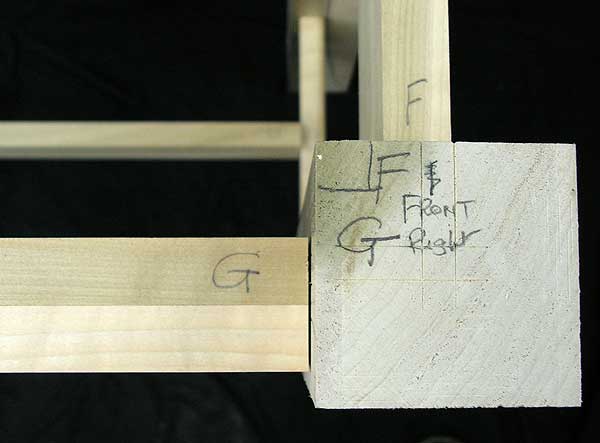
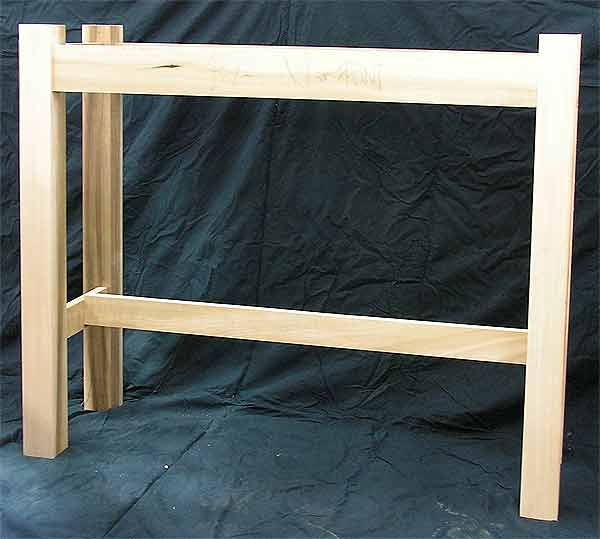
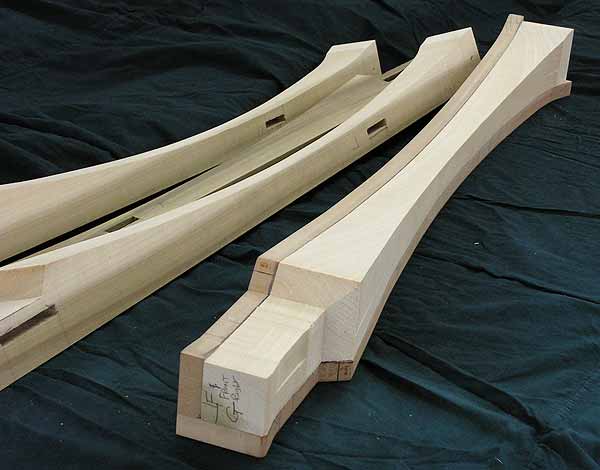
The fully jointed and dry assembled leg set, below.

Home Biography Tables, Chairs Cabinet Furniture Beds, Built-ins, Other Work Exhibitions, Galleries, News
Articles Teaching and Student Work
Contact
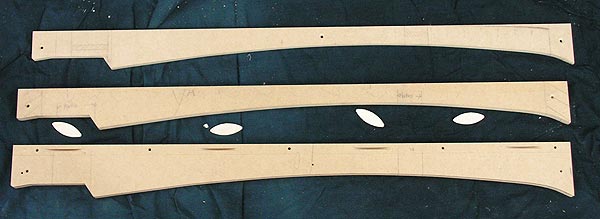
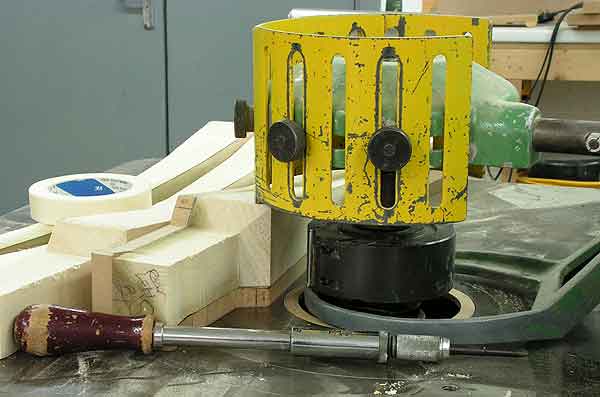
Creating
the leg profiles required jigs, see below. From top, the master jig
used to make up the two profiles at the middle and bottom.
Biscuits and screws join the middle and bottom profiles in this picture
to form a right angled jig that holds the leg during profiling on a
spindle moulder (shaper in the US) and hand held router-- see
subsequent images..
Below. The assembled leg profiling jig.
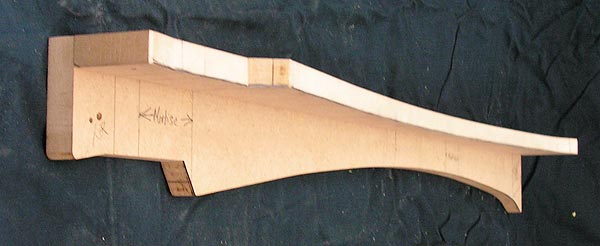
Prior
to undertaking the joinery illustrated in earlier pictures in this
sequence, the profiling jig is screwed to each leg blank and the
profile traced around with a soft thick pencil. The position of the
mortices is also transferred from the jig to each leg blank at
this time using a fine 0.5 mm mechanical pencil. The jig is unscrewed
and set to one side after this. Fully attaching the leg to the jig at
this point ensures that the two items match up exactly as before when
they are joined together again to undertake later shaping operations.
Below.
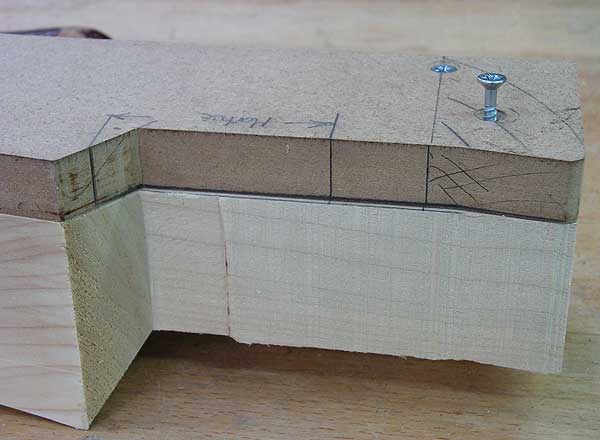
Showing screw attachment of profiling jig to leg blank. The limits of
the mortice are also visibly marked on the jig and transferred to the leg. The leg here is already
partially shaped.
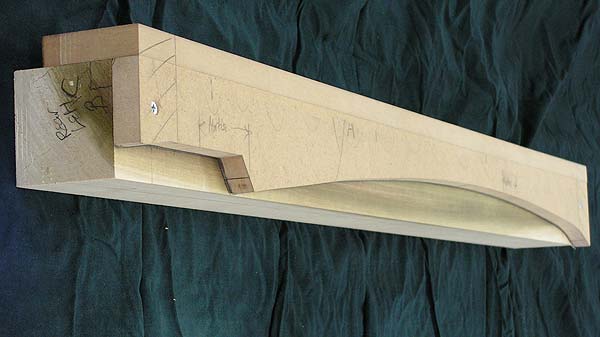
Bandsawing close to the pencil marked lines after removal of the profiling jig.
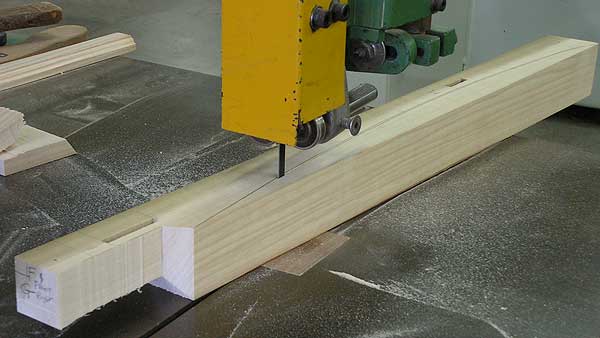
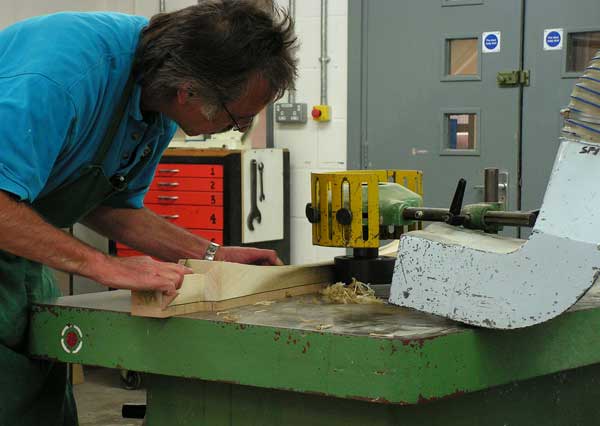
The
majority of the profiling uses a ring fence and straight profile cutter
block on a spindle moulder (shaper in the US). The profiling jig is
reattached to the bandsawed leg blank after bandsawing the leg roughly
to shape. (Note.
One of my trusty cordless screwdrivers seen in this image
has provided maintenance and battery free service for over thirty
years!)
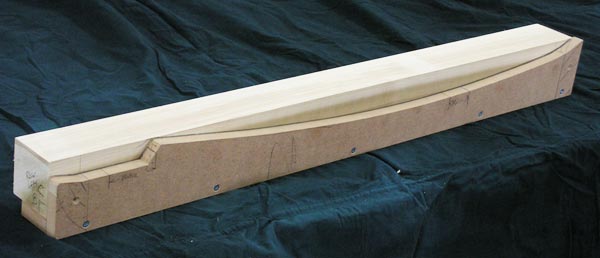
Most of the leg shaping on the spindle moulder had been completed in the image below.
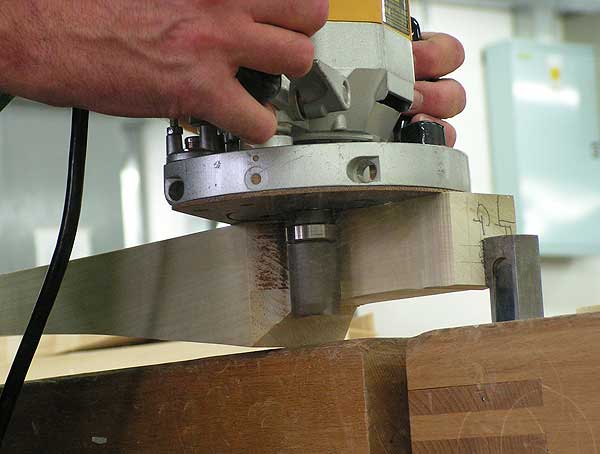
A
hand held router and top bearing pattern cutting bit finished the
shaping where the ring fence of the spindle moulder could not gain
access at the top of the leg.
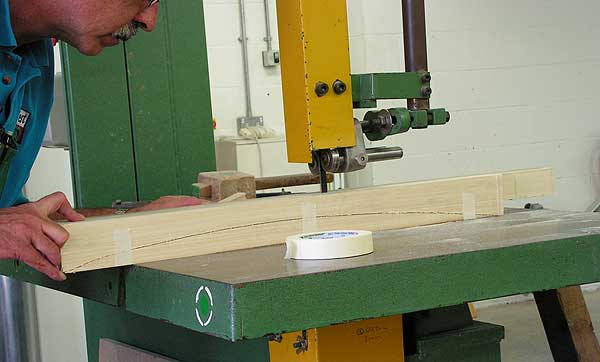
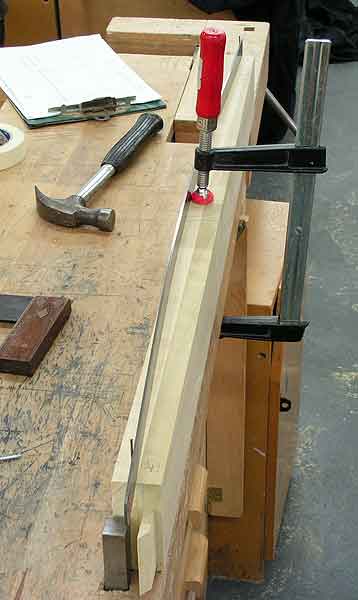
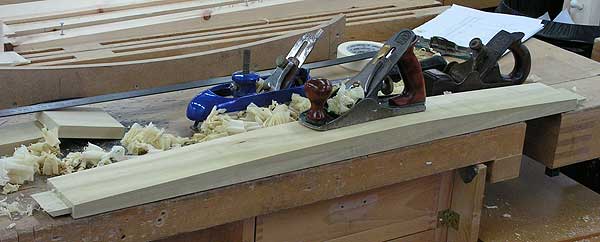
These
last two images show how a curve was created on the front rail using a
rule, a couple of pins and a clamp in the centre to form a 'sweet'
curve to pencil around. The final picture shows typical tools for
refining shapes and curves that remove machine marks prior to final
scraping and sanding, the subsequent glue-up of the legset, and
the
finishing procedures undertaken at the end.
Home Biography Tables, Chairs Cabinet Furniture Beds, Built-ins, Other Work Exhibitions, Galleries, News
Articles Teaching and Student Work
Contact
© 2019 Richard Jones